

Mastering Lead Attribution: How to Track UTM Sources in ActiveCampaign via Google Tag Manager
In the modern digital marketing landscape, the ability to trace a conversion back to its original touchpoint is the difference between a high-performing campaign and a budget black hole. For many businesses, the customer journey is rarely linear. A potential lead might click an ad, browse a product page, leave, and return days later via a direct search to finally fill out a signup form.

Without a robust attribution strategy, this critical sale is often misclassified as "Direct" or "Organic," leaving marketers unable to verify which advertising channels—Facebook, Google Ads, or email newsletters—are actually driving revenue.
This article provides a comprehensive guide on how to bridge the gap between your website’s front-end traffic and your CRM, specifically focusing on importing UTM parameters into ActiveCampaign using Google Tag Manager (GTM).
The Strategic Importance of Lead Source Attribution
Attribution is the bedrock of return on investment (ROI) analysis. When you send UTM parameters directly into your CRM, you transform raw, siloed contact data into actionable business intelligence.
Why You Need This Data
- Budget Optimization: By knowing exactly which campaign drove a high-value lead, you can pivot your ad spend toward high-conversion channels.
- Backtracking Conversions: If a user buys a product weeks after their first visit, you can look into their profile in ActiveCampaign and identify the exact campaign that introduced them to your brand.
- Segmentation: You can create automated email sequences triggered specifically by the user’s source. For example, a user who arrived via a "Summer Sale" campaign can be funneled into a specific nurture sequence that a "General Interest" lead would not receive.
Step 1: Configuring Custom Fields in ActiveCampaign
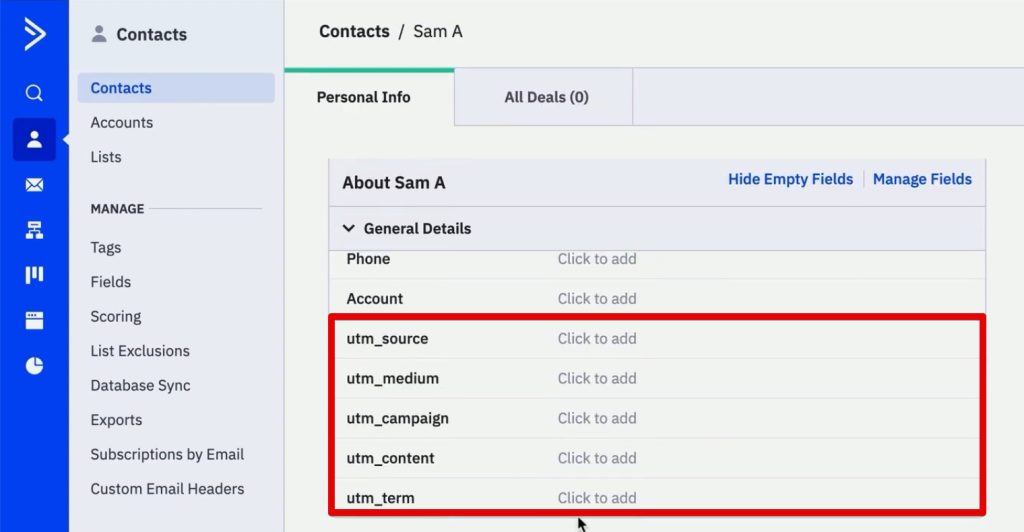
Before you can capture data, you need a place to store it. ActiveCampaign doesn’t track UTM parameters out of the box, so you must create custom fields in your contact profile.
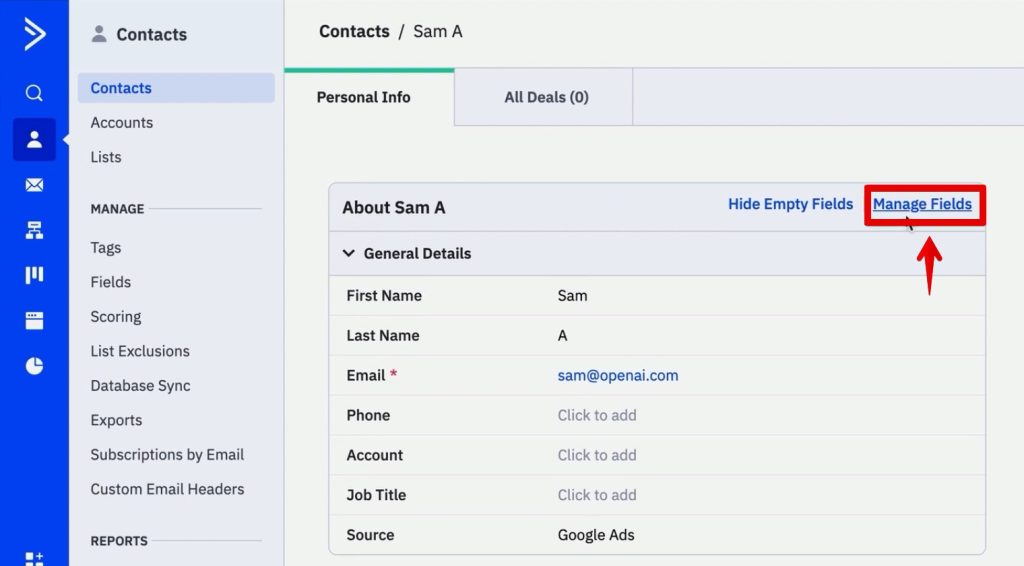
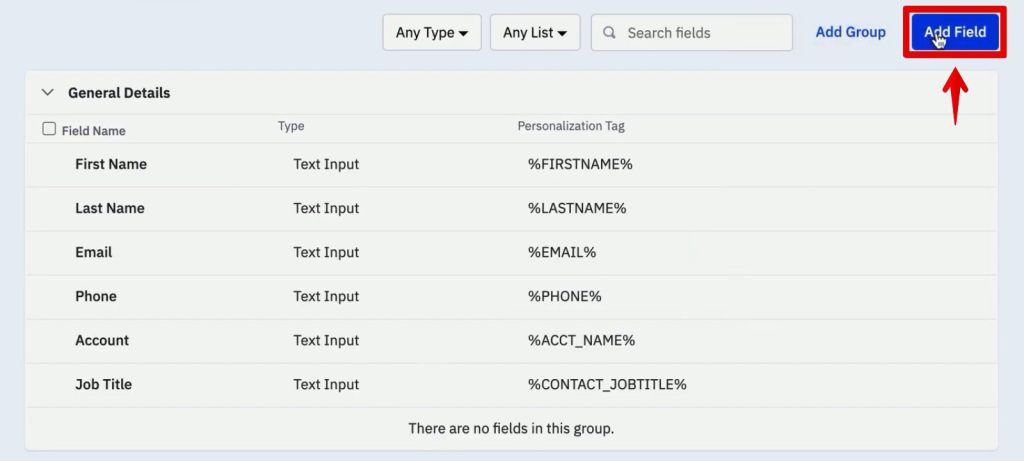
- Access the Field Manager: Navigate to the Contacts section in your ActiveCampaign dashboard and select Manage Fields.
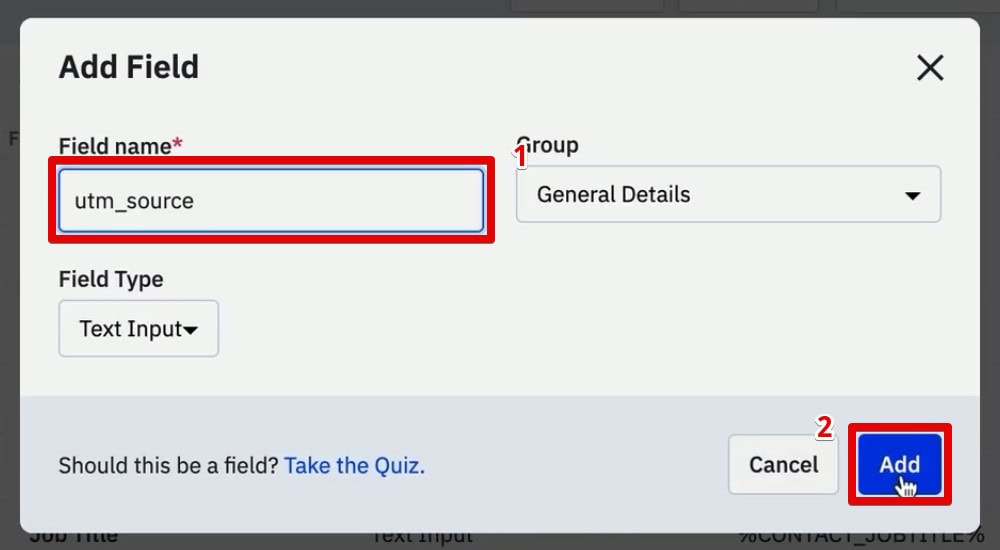
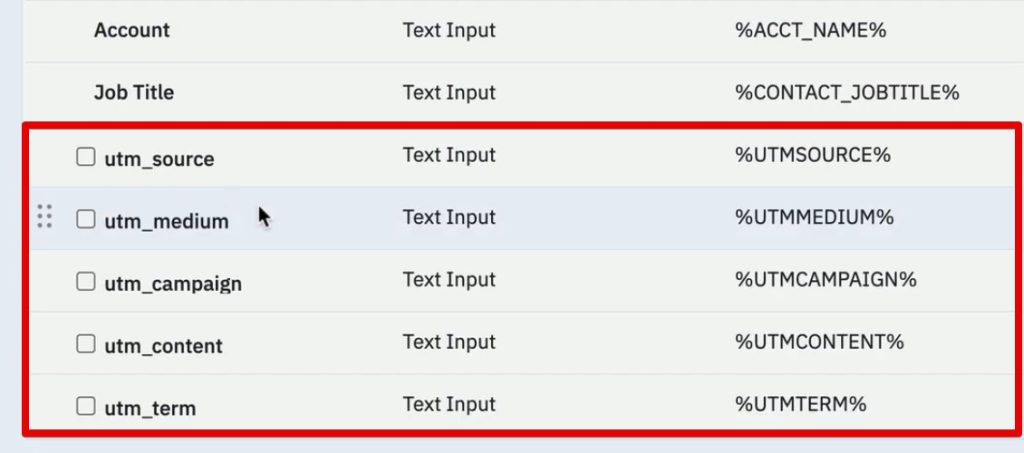
- Create New Fields: Click Add Field. For a comprehensive setup, you should create five distinct fields corresponding to standard UTM parameters:
utm_sourceutm_mediumutm_campaignutm_contentutm_term
- Deployment: Once these fields are created, they will appear as empty containers within every contact profile. Your next task is to automate the process of filling these containers the moment a user submits a form.
Step 2: Designing and Integrating the Form
Your goal is to capture the UTM data during the sign-up process without cluttering the user experience.
Setting Up the Inline Form
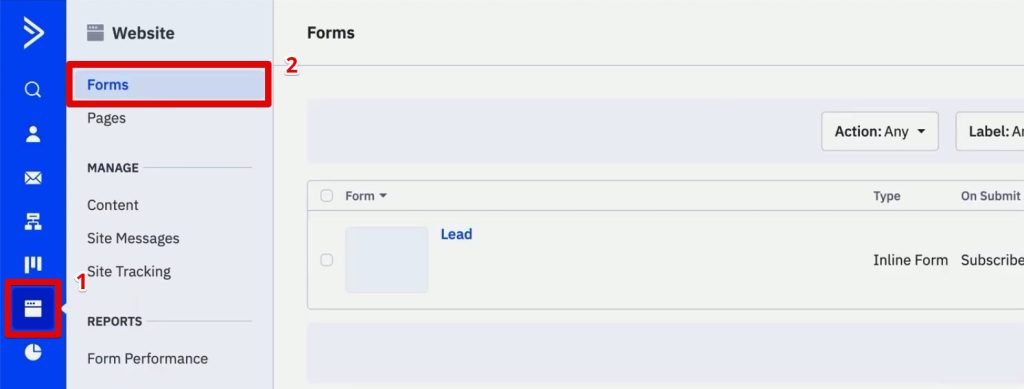
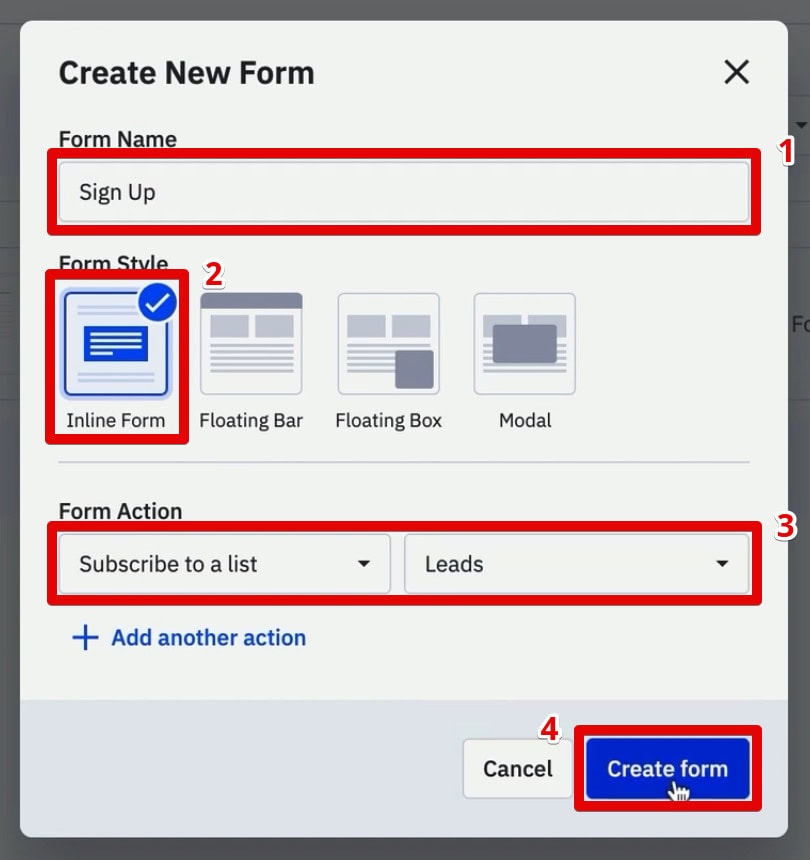
Go to Website > Forms in ActiveCampaign and create a new Inline Form. Configure the action to "Subscribe to a list" (e.g., your "Leads" list).
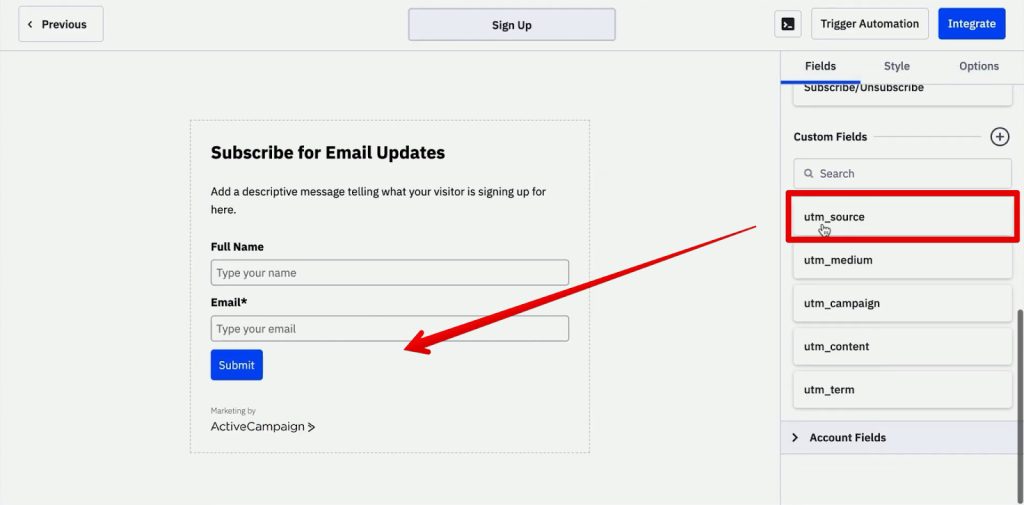
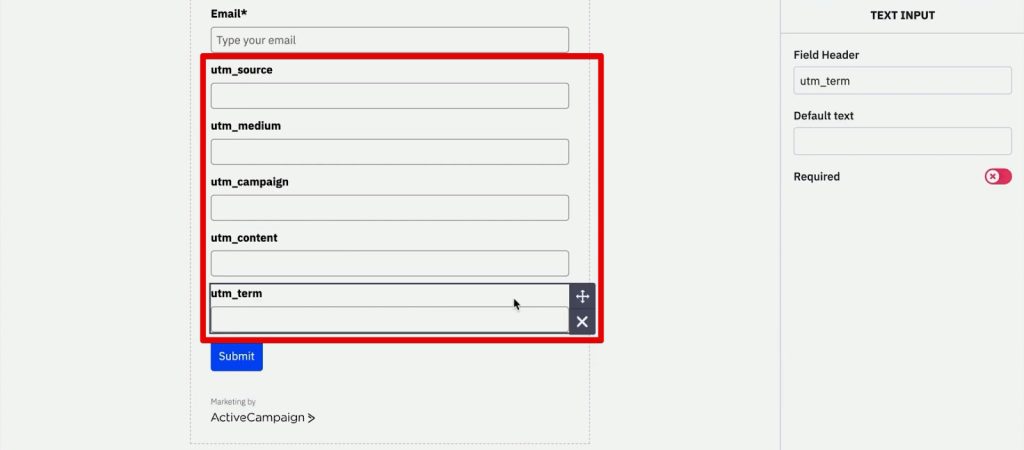
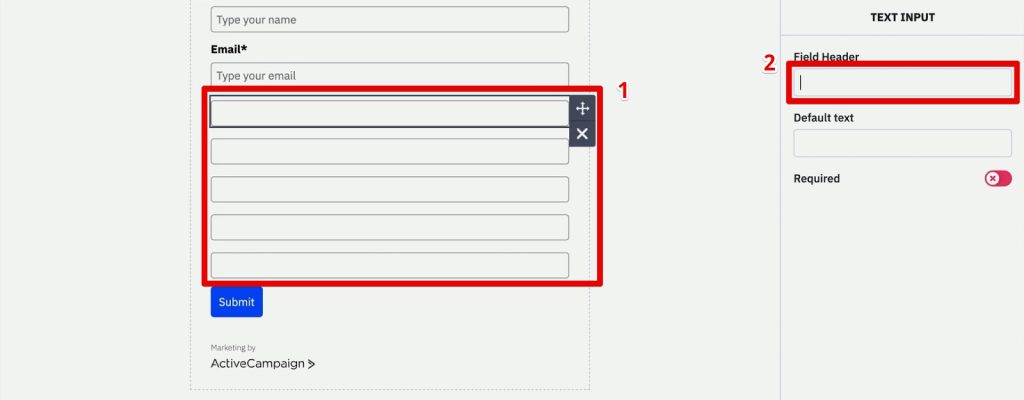
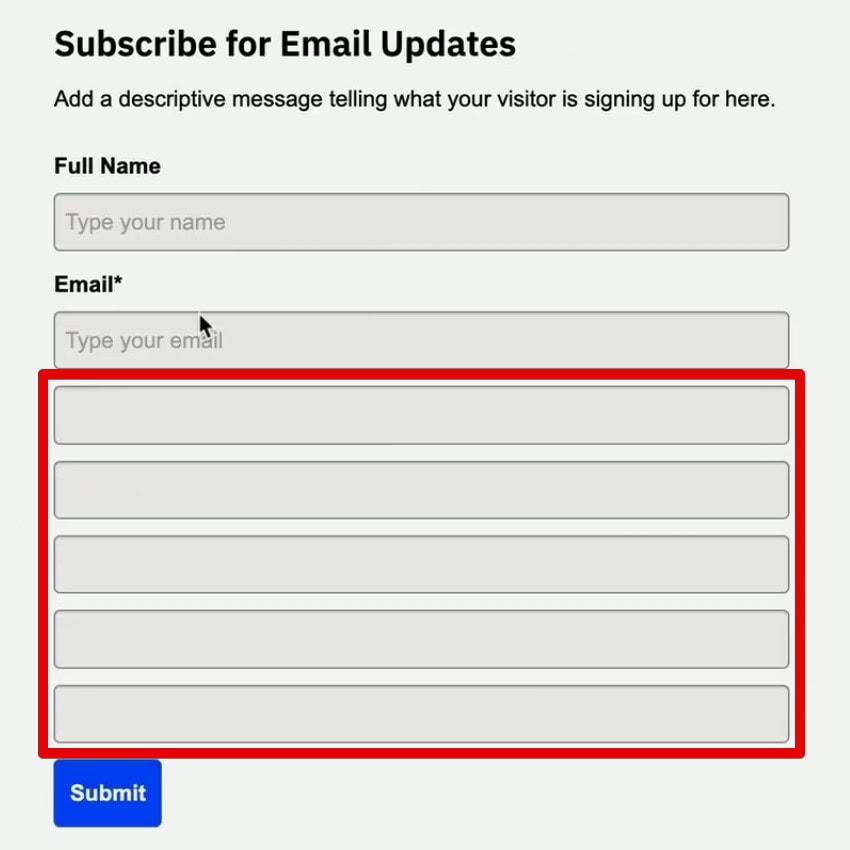
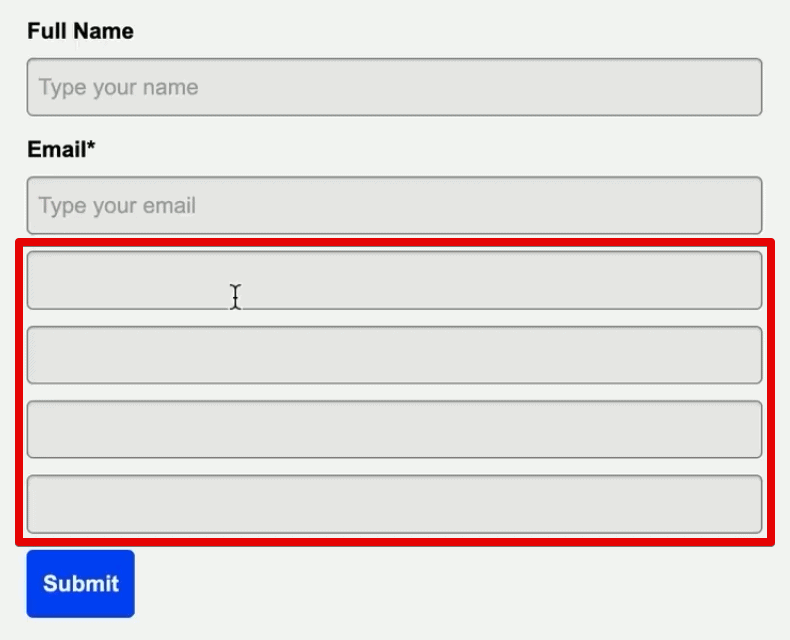
Once the form structure is ready, drag and drop the five newly created UTM custom fields into the form. Crucially, remove the labels and headers for these fields to maintain a clean aesthetic. Even though they are visible in the form builder, we will use technical workarounds to ensure they remain invisible to the end user.
Embedding the Form
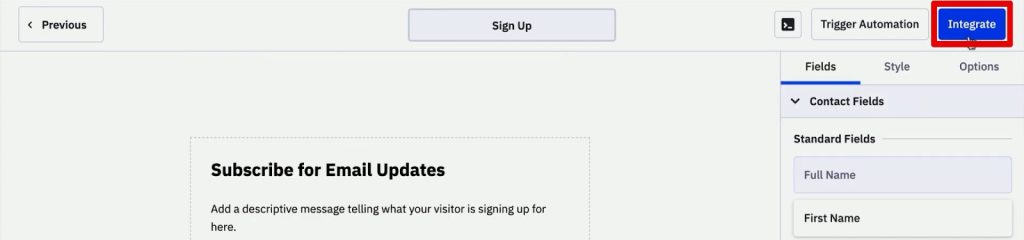
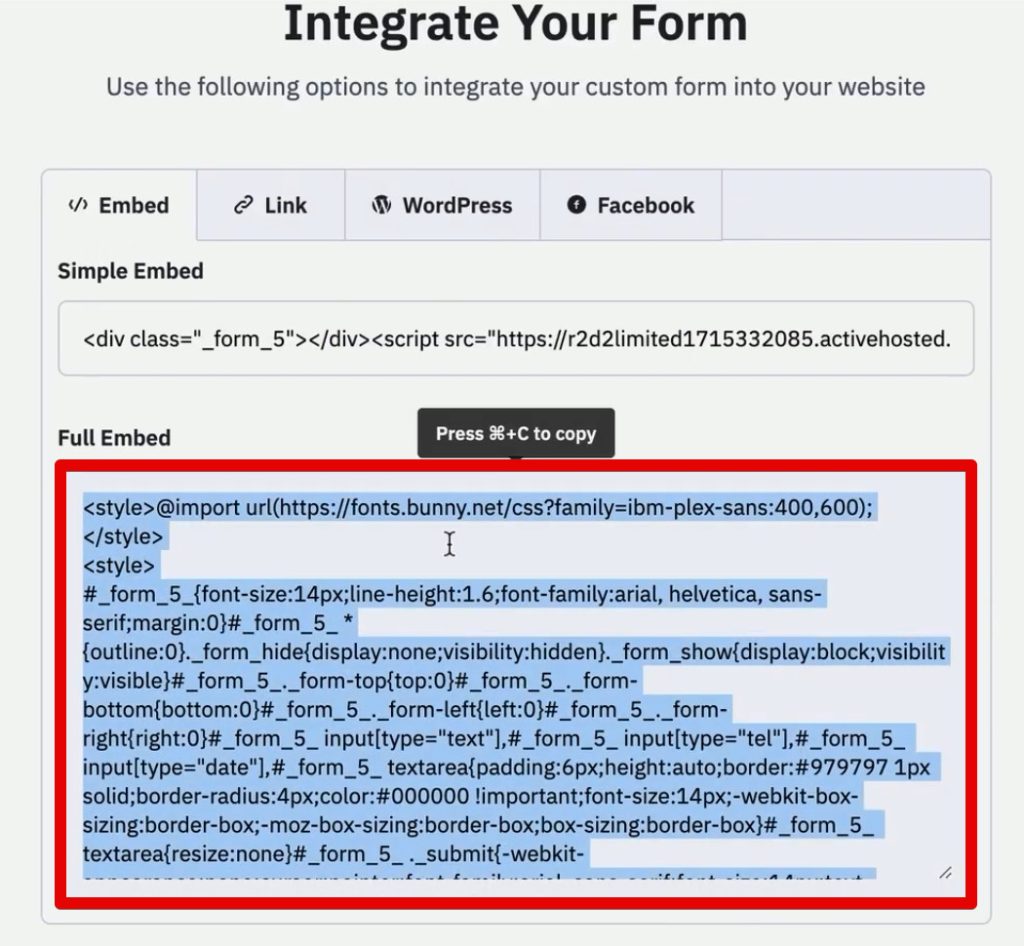
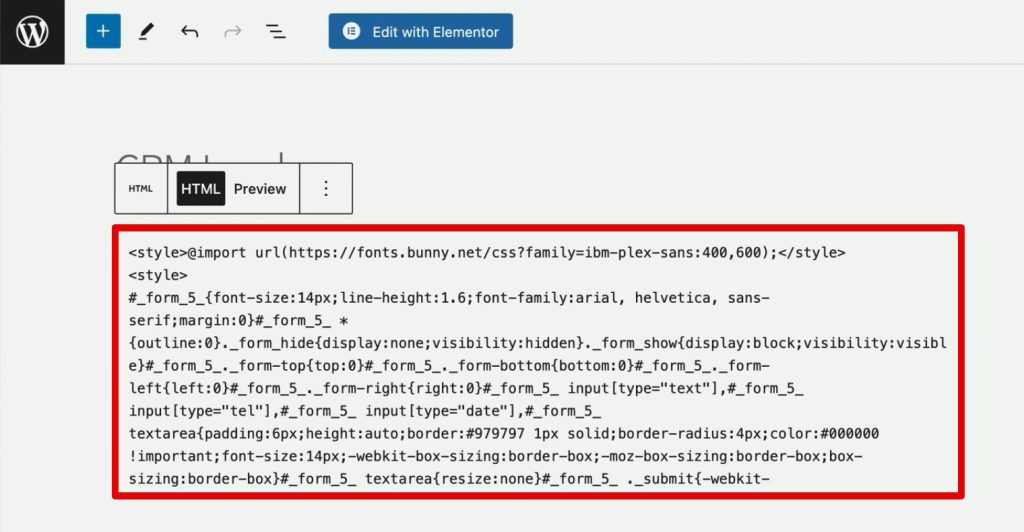
After clicking Integrate, copy the full HTML embed code. Paste this code directly into the source HTML of your website’s landing page. This gives you full control over the form’s behavior, allowing you to manipulate the input types via code.
Step 3: Hiding Fields via HTML Modification
While the form is embedded, the UTM fields will appear as standard text inputs. To fix this:
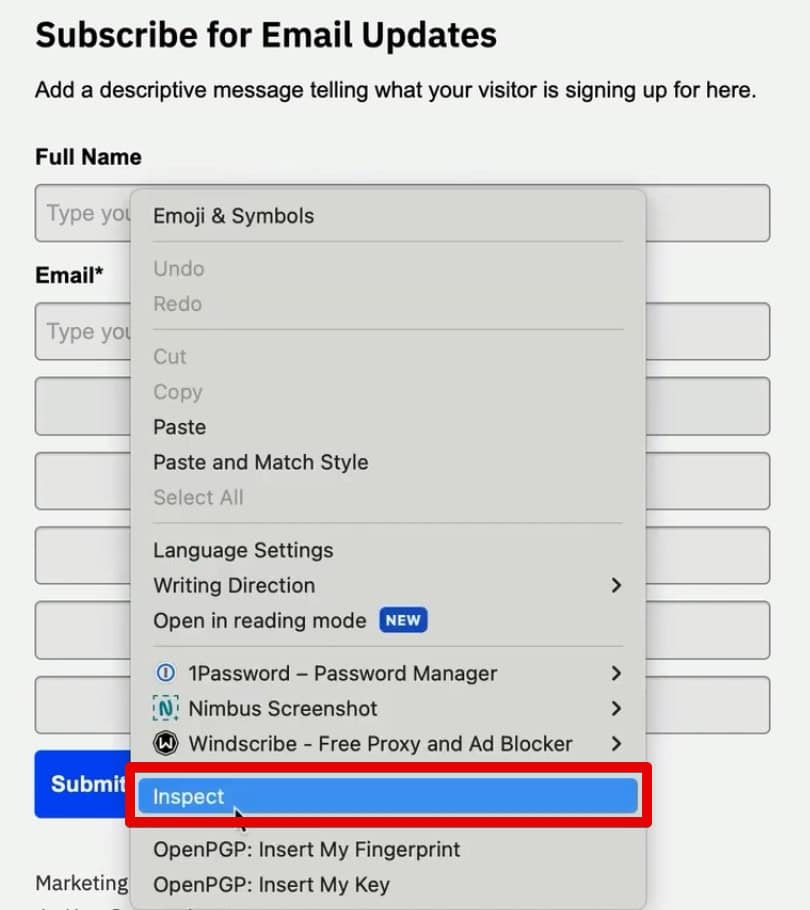
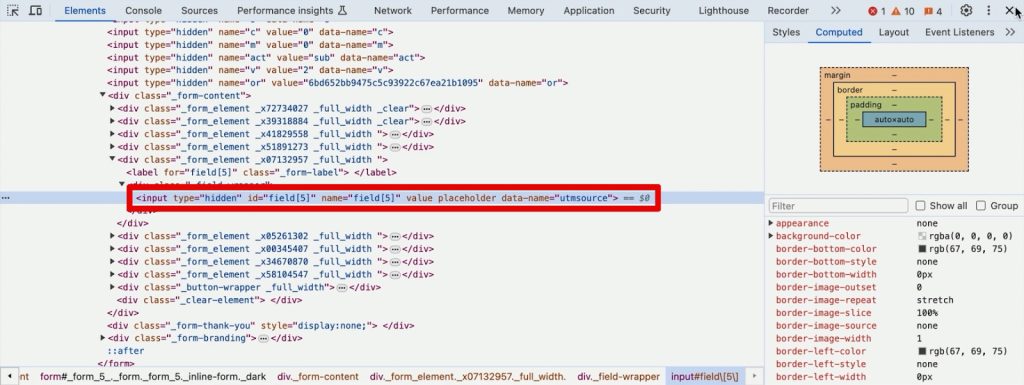
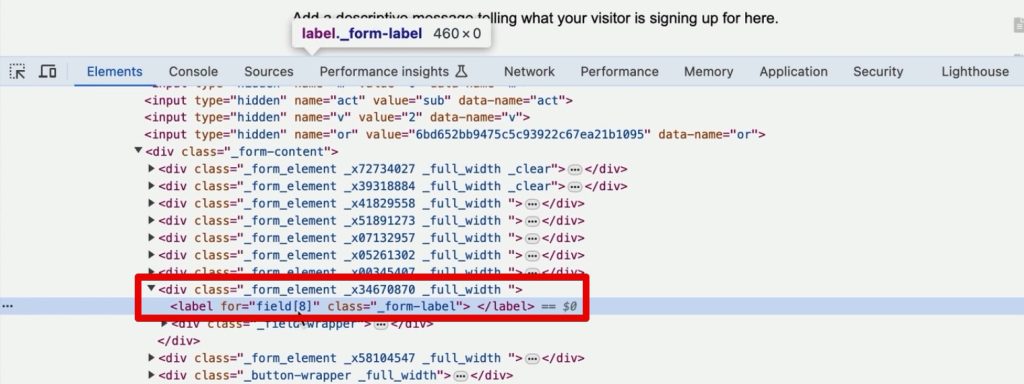
- Use Chrome Developer Tools (Right-click the field > Inspect).
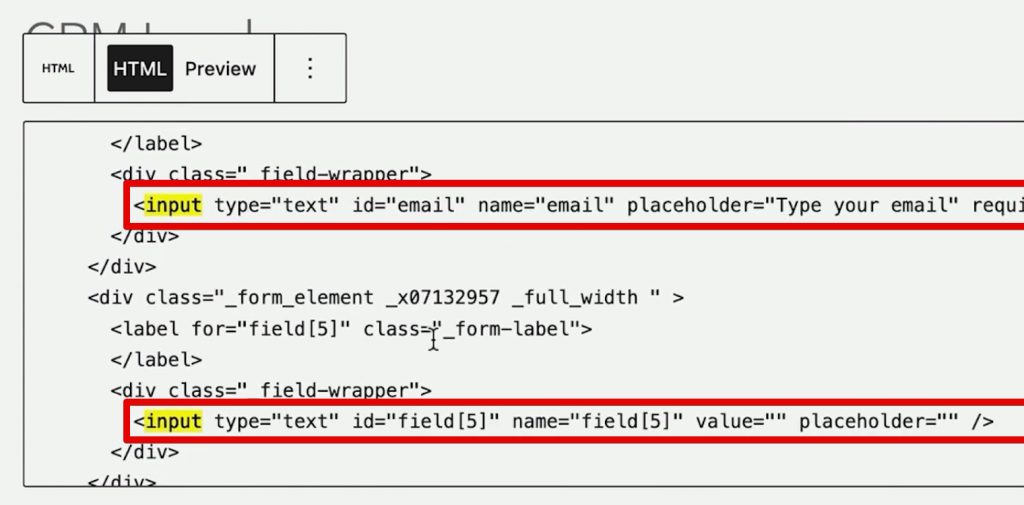
- Locate the input tags for your UTM fields.
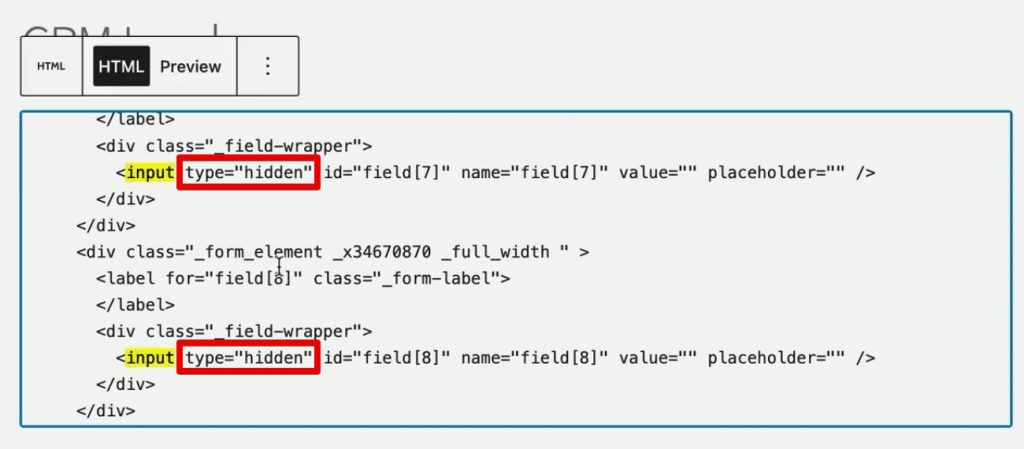
- Change the
type="text"attribute totype="hidden".
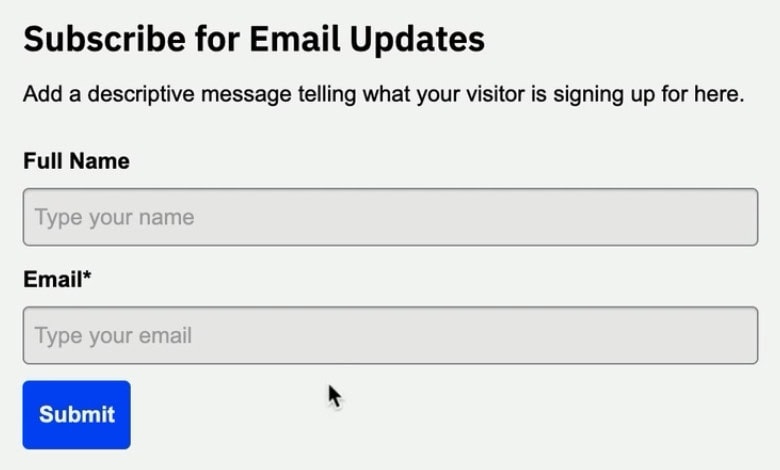
By modifying the HTML, you ensure that the fields exist in the browser’s DOM (Document Object Model) and can receive data, but they remain completely invisible to the visitor.
Step 4: The Role of First-Party Cookies
UTM parameters are typically found in the URL query string, but this information vanishes as soon as the user navigates to a second page. To solve this, we must use first-party cookies to "remember" the source information throughout the user’s session.
Implementing the Tracking Tag in GTM
- Create a New Tag: In Google Tag Manager, select Custom HTML.
- The Script: You will need a JavaScript snippet that parses the URL query strings and sets a cookie. This script will run on your landing page.
- Triggering the Tag: Set the trigger to fire on Page View events where the
Page URLcontains "utm_medium". This ensures the script only executes when a user arrives with campaign tracking data.
Step 5: Automating the Form Fill
Now that the data is safely stored in a cookie, we need to pass it into the hidden form fields.
The Second Script
Create a second Custom HTML tag in GTM. This script will:
- Read the information from the cookie.
- Map the data to the specific form fields using CSS selectors.
Defining CSS Selectors
To map the data correctly, you must tell GTM exactly which input field corresponds to which UTM parameter. By right-clicking the field in your browser and selecting Copy Selector, you can grab the unique identifier for that field.
Use this to write a function that populates the field value with the cookie data. Set the trigger for this tag to DOM Ready, ensuring the script only runs after the form has finished loading on the page.
Testing and Validation
Never publish a tracking implementation without thorough testing.
- Use GTM Preview Mode: Open your website through the Tag Assistant and append manual UTM parameters to the URL (e.g.,
?utm_source=google&utm_medium=cpc). - Check the Cookie: Open the Application tab in Chrome Developer Tools and verify that a cookie named
source_queryhas been created and contains your data. - Verify the Form: Navigate to the page containing your form. Even if you cannot see the fields, use the "Inspect" tool to change the type from
hiddenback totext. If the fields are populated with the correct UTM values, your implementation is successful. - Final Submission: Submit a test lead and check your ActiveCampaign Contact record. If the UTM fields are populated, you have successfully bridged the gap between traffic and CRM.
Implications for Digital Strategy
Implementing this system provides significant advantages for long-term marketing strategy.
Data Integrity and Attribution
By automating this process, you eliminate the human error associated with manual data entry. You gain a granular view of the "First Touch" vs. "Last Touch" attribution, which is vital for understanding the full customer lifecycle.
Scaling Your Efforts
While the method described uses custom scripts, developers and marketers should consider the scalability of these solutions. As your organization grows, maintaining custom scripts across multiple forms and websites can become cumbersome. Solutions like the SourceLink App are being developed to automate this exact workflow, removing the need for manual CSS selector mapping and JavaScript maintenance.
Ethical Data Collection
Always ensure your cookie implementation is compliant with local regulations like GDPR or CCPA. Because you are using first-party cookies to track user sources, you are generally on safer ground than with third-party tracking, but transparency in your privacy policy remains essential.
Conclusion
Tracking lead sources in ActiveCampaign is more than a technical task; it is a fundamental requirement for data-driven growth. By leveraging the power of Google Tag Manager, JavaScript, and persistent cookies, you can capture the exact journey of every lead that enters your ecosystem.
Whether you are running simple search campaigns or complex multi-channel marketing funnels, this setup ensures that your attribution data is accurate, reliable, and ready to be used for optimization. Start with the five primary UTM parameters, test thoroughly, and refine your process as your business evolves. Your future marketing self will thank you for the clarity.
