
Seamless Transition: A Comprehensive Guide to Migrating Your Email Marketing from Mailchimp to Campaign Monitor
In the competitive landscape of digital marketing, the platform you choose to manage your audience is as critical as the creative content you send them. For many small-to-medium enterprises, Mailchimp has long served as a default entry point into email marketing. However, as businesses scale and their marketing requirements evolve, the search for more specialized, intuitive, and cost-effective solutions often leads them to Campaign Monitor.
Migrating your email marketing infrastructure can feel like a daunting technical hurdle. Yet, with a structured approach, the transition is not only manageable but an opportunity to clean your data and refine your engagement strategy. This guide provides an in-depth look at why businesses are making the switch and offers a precise, step-by-step roadmap to ensure your marketing efforts continue without missing a beat.
The Strategic Shift: Why Businesses Are Moving to Campaign Monitor
For over two decades, Campaign Monitor has carved out a distinct niche in the email marketing sector. While industry trends have shifted toward "all-in-one" platforms that bundle CRM, e-commerce, and social media management into increasingly expensive, complex suites, Campaign Monitor has maintained a steadfast focus on the core pillar of digital marketing: high-impact email communication.
The Problem with "Omnichannel" Bloat
Many modern marketing platforms have become bloated with omnichannel features that many small businesses neither need nor have the time to master. This feature-creep often leads to higher subscription costs and a steeper learning curve for teams that simply want to send beautiful, high-converting emails.
The Campaign Monitor Advantage
Campaign Monitor distinguishes itself through:
- Intuitive Design: Their drag-and-drop template builder is engineered for marketers of all skill levels, ensuring that mobile-responsive designs are the standard, not the exception.
- Deliverability Excellence: With a world-class support and deliverability team, users benefit from higher inbox placement rates, ensuring that your carefully crafted campaigns actually reach their intended audience.
- Purpose-Built Tools: By focusing on email as a primary channel, the platform provides deeper insights into subscriber behavior, allowing for more precise segmentation and automation without the distraction of unnecessary tools.
The Migration Chronology: A Step-by-Step Execution
Transitioning your audience is a mechanical process, but it requires careful attention to detail to ensure data integrity. Follow these steps to move your lists seamlessly.
Phase 1: Data Extraction from Mailchimp
Before you can move your audience, you must secure your data.
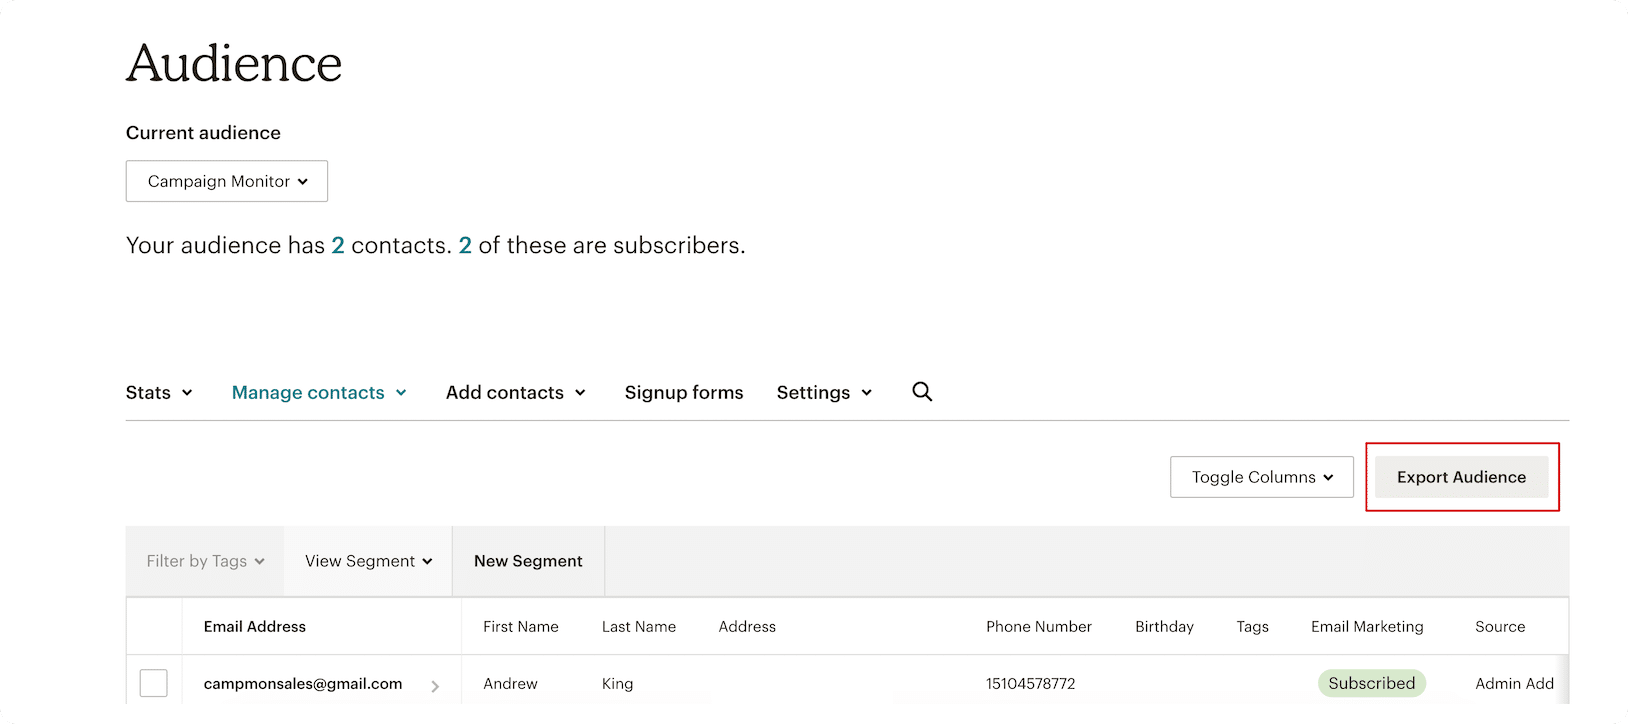
- Select Your Audience: Navigate to your Mailchimp dashboard and identify the specific audience lists you intend to migrate.
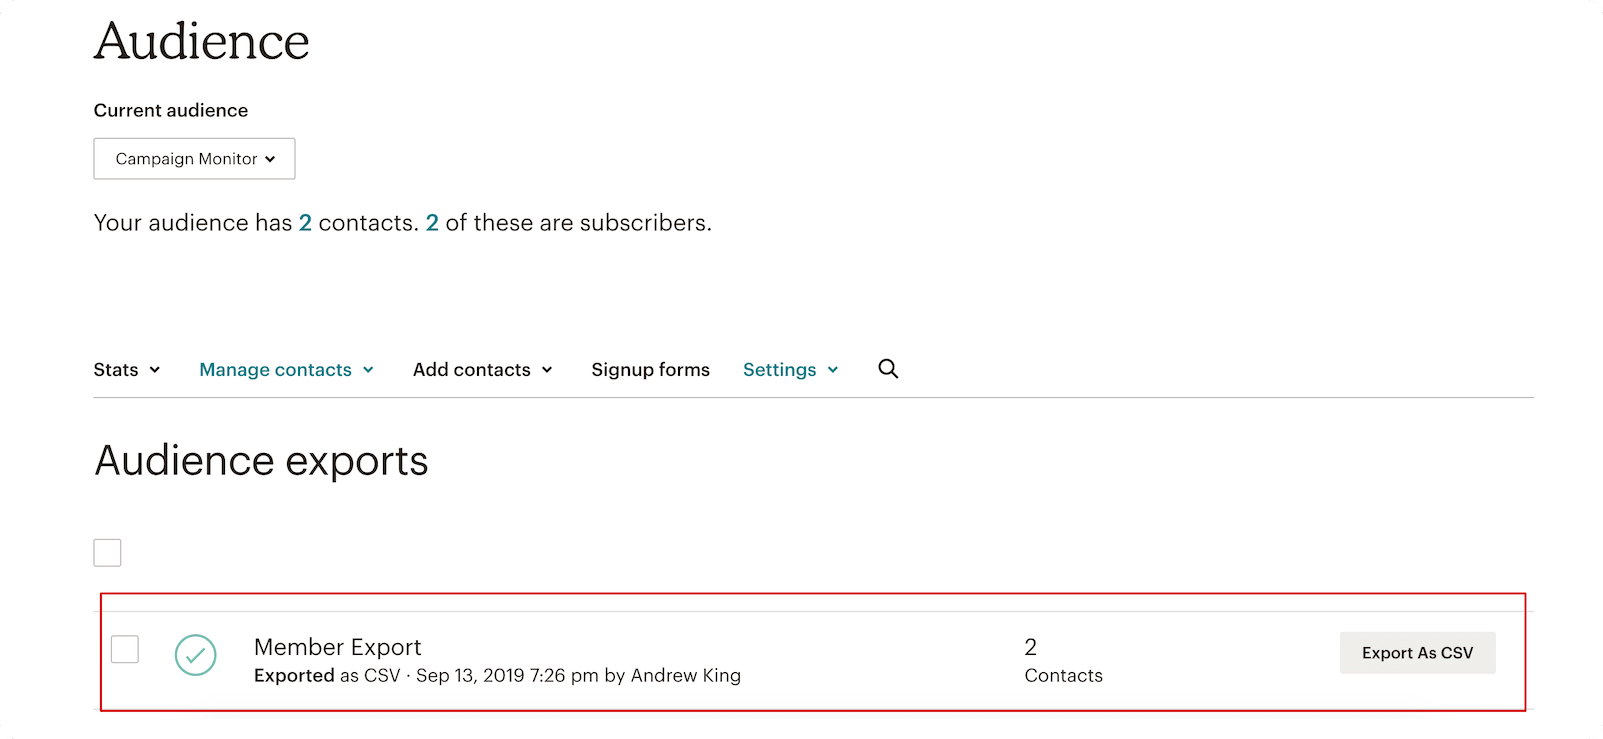
- Initiate Export: Click the "Export Audience" button. Mailchimp will process your request, which may take a few moments depending on the size of your database.
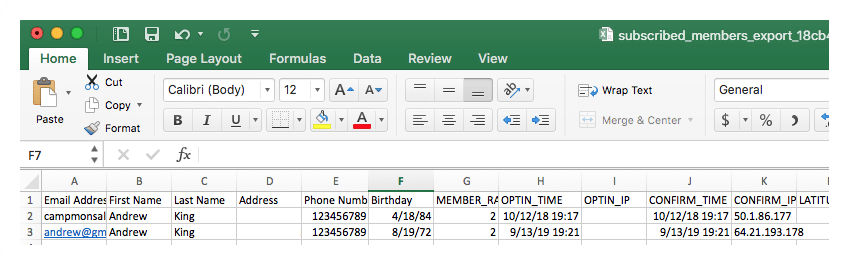
- Download the CSV: Once the file is ready, click "Export as CSV." Ensure you save this file in an easily accessible location on your local machine. This file contains your subscriber email addresses, names, and any custom merge tags you’ve used for personalization.
Phase 2: Preparing for the New Ecosystem
Once you have your data, your next step is to initialize your presence on Campaign Monitor. If you are not yet ready to commit, the platform offers a free trial, which is an excellent way to test the layout of your templates before fully importing your subscriber base.
- Account Creation: Visit the Campaign Monitor signup page and establish your account.
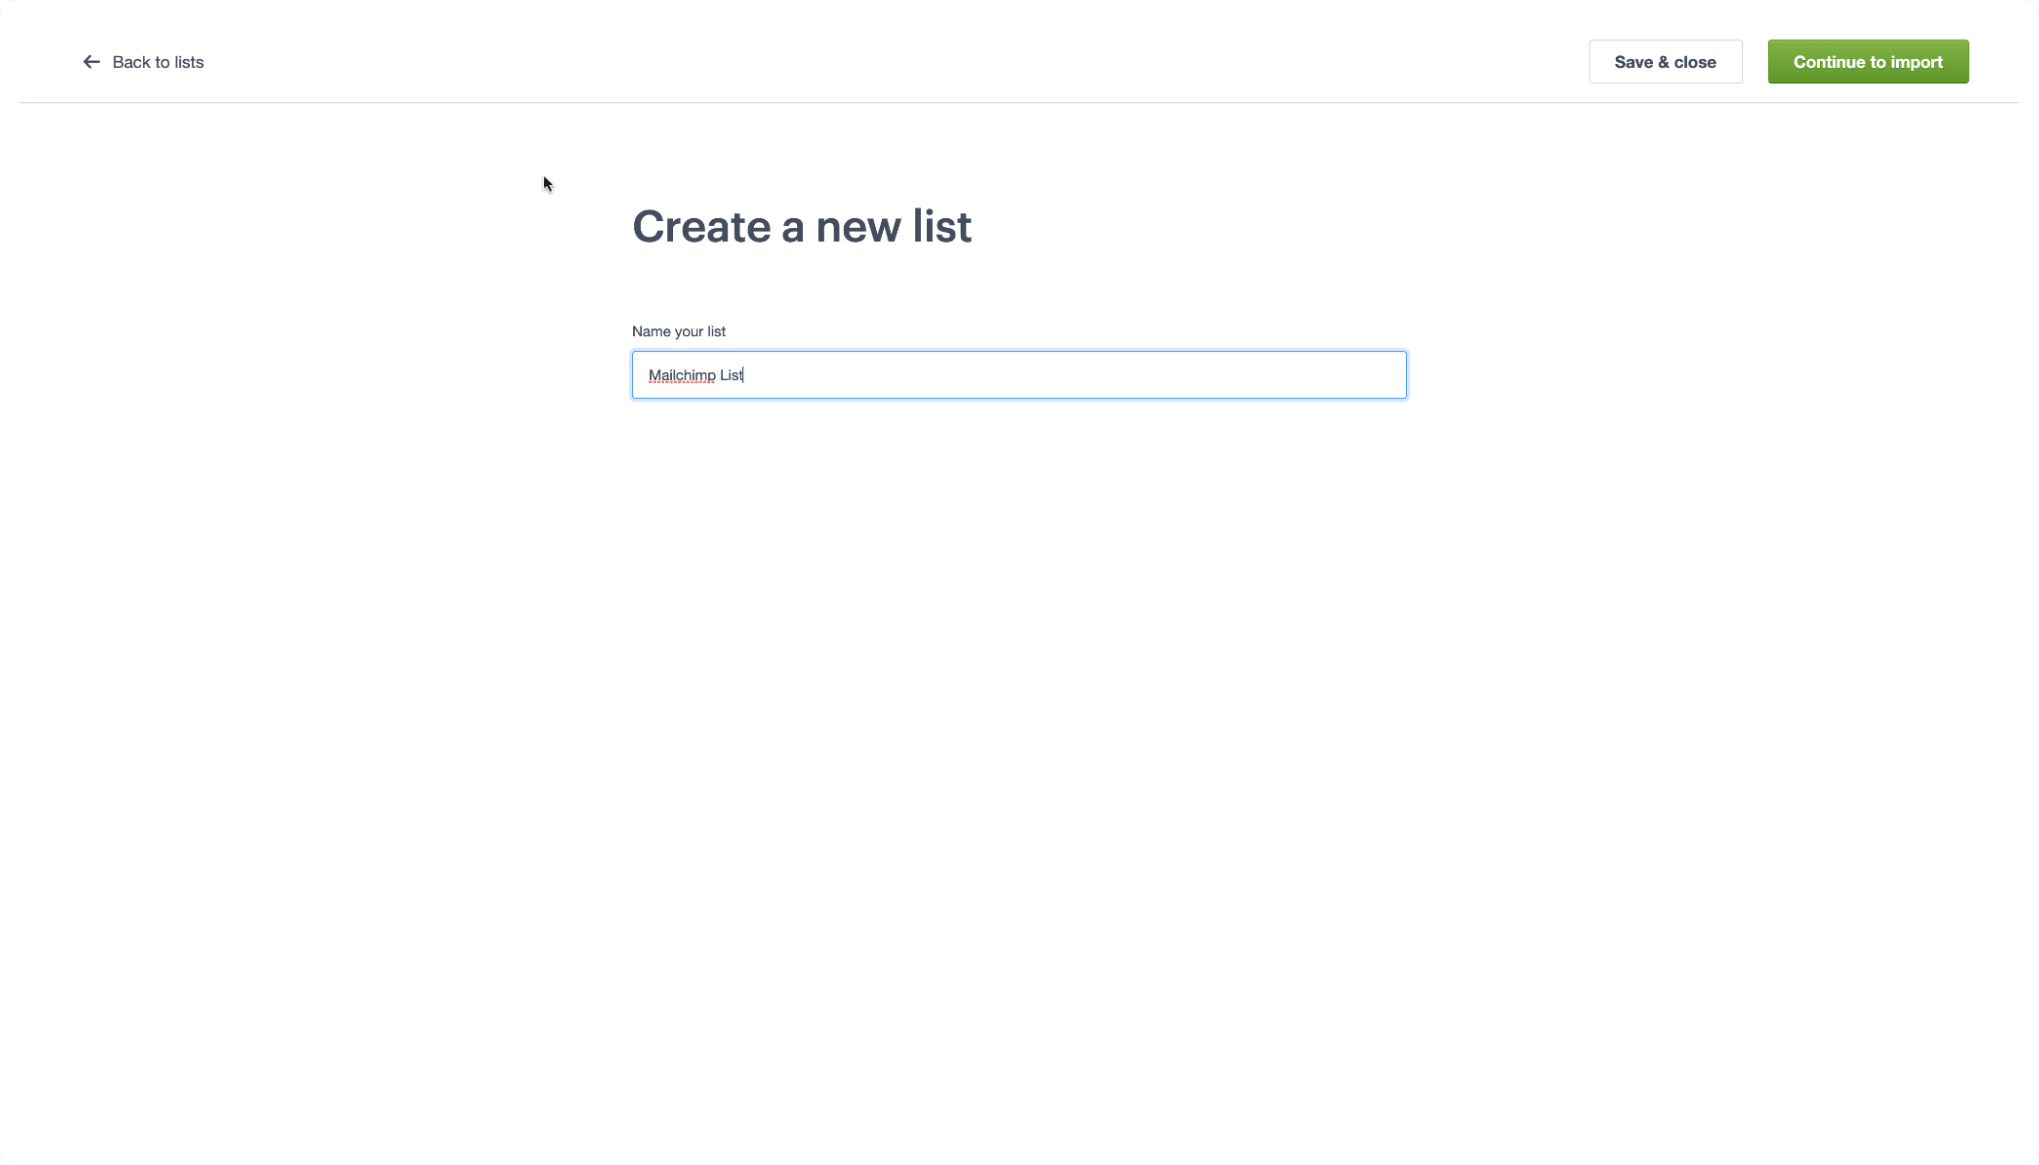
- Create Your List: Navigate to the "Lists & Subscribers" tab in the main navigation menu. Select "Create a new list," provide a descriptive name for your audience, and select "Continue to import."
Phase 3: The Import and Data Mapping
This is the most critical stage of the migration.
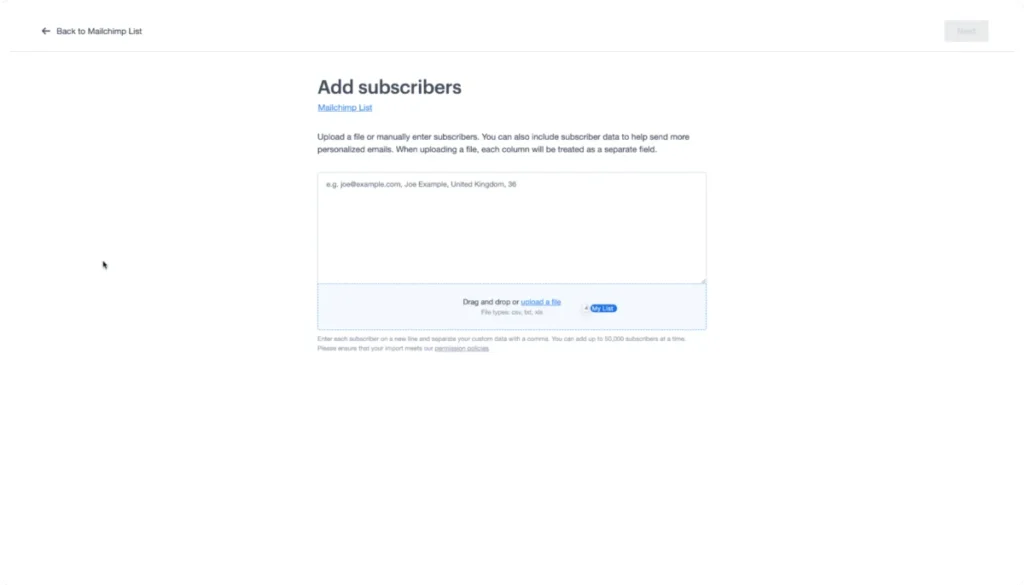
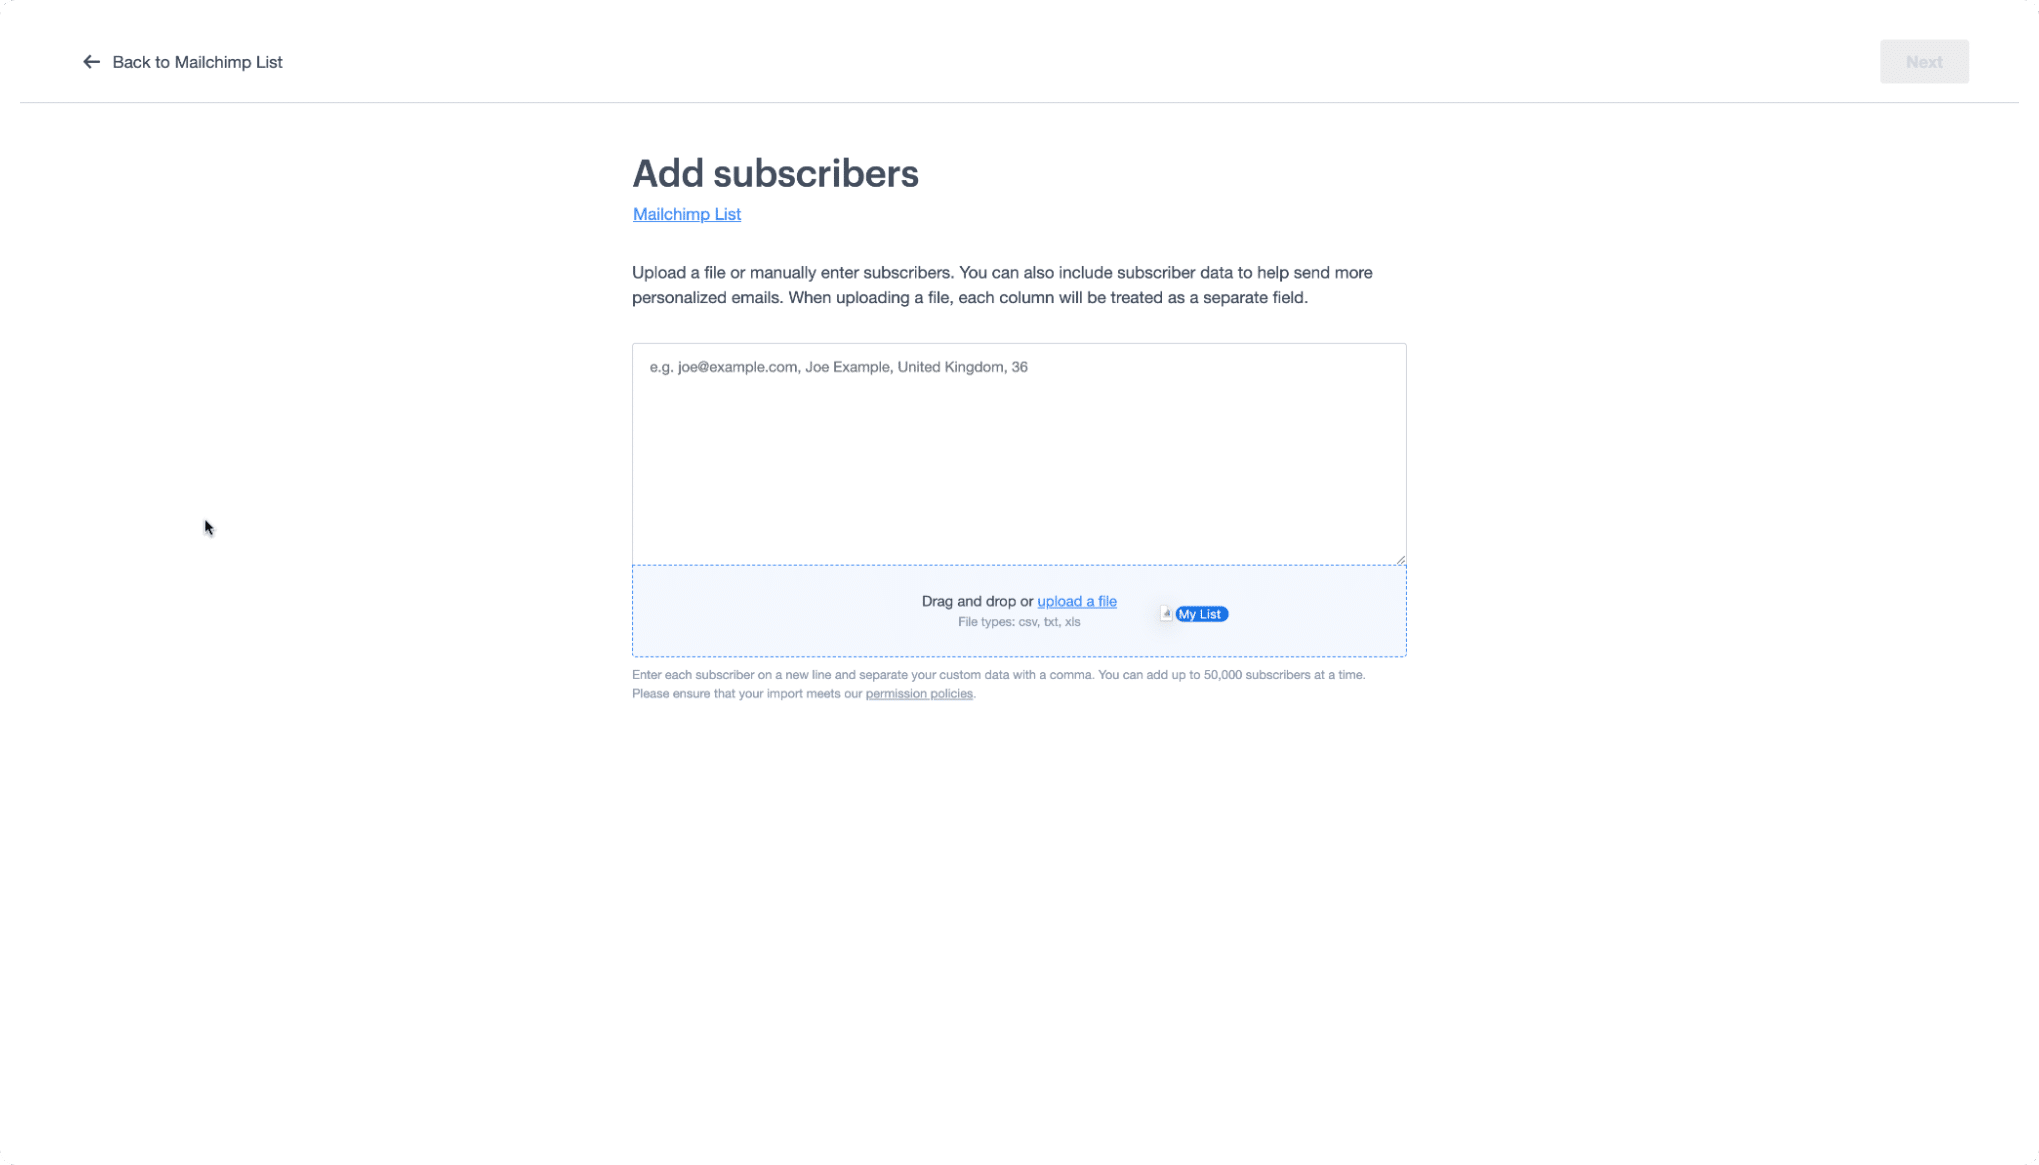
- Drag and Drop: Simply drag your saved CSV file into the designated upload area within the Campaign Monitor interface.
- Field Mapping: As the data uploads, the system will prompt you to map your Mailchimp columns to Campaign Monitor’s custom fields. If your CSV headers match the naming conventions within Campaign Monitor, the system will automate this process. If not, you will manually align your data points—such as "First Name," "Last Name," or "Purchase History"—to ensure that your personalization tags remain functional.
Supporting Data: Understanding the Terminology Shift
One of the most significant challenges during any platform migration is the "language barrier." Different platforms use different nomenclature for the same features. Understanding these differences is essential for maintaining your segmentation logic.
Migration Glossary
| Mailchimp Term | Campaign Monitor Equivalent |
|---|---|
| Audience | List |
| Subscribed Contact | Subscriber |
| Tags | Custom Fields |
| Groups | Segments |
- Audiences vs. Lists: In Mailchimp, an "audience" acts as a container. In Campaign Monitor, these are referred to as "Lists." Your strategy for storing data remains the same, but the terminology changes.
- Tags vs. Custom Fields: If you have been using tags to label contacts based on behavior, these will be imported as "Custom Fields" in Campaign Monitor. This ensures that you don’t lose the granular data you’ve collected on your users.
- Groups vs. Segments: The way you slice your data to send targeted emails is handled via "Segments" in Campaign Monitor. This feature is particularly powerful for personalizing content based on specific user interests or previous purchase behaviors.
Implications for Your Marketing Strategy
Moving your email service provider (ESP) is not just a technical update; it is an opportunity for a "marketing audit." When you migrate, you should take the following implications into account:
1. Data Hygiene
Exporting your list is the perfect time to purge inactive subscribers. By removing users who haven’t opened an email in over six months, you will likely see an immediate improvement in your open rates and sender reputation upon moving to the new platform.
2. Template Modernization
Do not simply copy-paste your old HTML. Use the migration as a chance to evaluate the performance of your previous templates. Campaign Monitor’s templates are built with modern mobile responsiveness in mind, which may outperform the older designs you were using in Mailchimp.
3. Regulatory Compliance
Ensure that your export from Mailchimp includes your "unsubscribe" data. You must maintain this data to ensure you do not inadvertently email someone who has previously opted out, which would violate anti-spam laws like CAN-SPAM or GDPR.
Official Guidance and Support
If you encounter technical difficulties during the transition, it is recommended that you consult the official Campaign Monitor Help Center. They provide a comprehensive library of resources, including video tutorials and troubleshooting guides that address specific edge cases in the migration process.
For those looking to master the platform, the "Campaign Monitor 101" training series is an invaluable resource. It covers everything from setting up your first automated customer journey to advanced segmentation strategies that go far beyond what is possible in basic entry-level platforms.
Disclaimer: This guide provides general information and discussion about email marketing and related subjects. The content provided should not be construed as, and is not intended to constitute, financial, legal, or tax advice. You should seek the advice of professionals prior to acting upon any information contained in this article. All content is provided strictly "as is" and we make no warranty or representation of any kind regarding the accuracy or efficacy of these procedures.
Editor’s note: This post was updated for accuracy and freshness in May 2026 to ensure all UI steps align with current platform versions.
