
Unlocking Marketing ROI: A Comprehensive Guide to Tracking Lead Sources in ActiveCampaign with UTMs and Google Tag Manager
Accurate lead source attribution is the bedrock of effective digital marketing. Without a clear understanding of where your leads originate, optimizing campaigns, allocating budgets, and demonstrating true return on investment becomes a significant challenge. This article delves into a robust methodology for tracking lead sources directly within ActiveCampaign, leveraging the power of UTM parameters, first-party cookies, and Google Tag Manager (GTM).

The Critical Imperative of Lead Source Attribution
In the dynamic landscape of digital marketing, users rarely convert on their first visit. A potential lead might discover your website through a social media ad, browse a few pages, leave, and then return days later via a direct search before finally completing a signup form or making a purchase. In such scenarios, standard analytics tools often struggle to accurately attribute the final conversion back to the initial, impactful source. This "last-touch" bias can severely skew marketing data, leading to misinformed strategic decisions and suboptimal budget allocation.

The inability to connect a sale or webinar registration to its original lead source is a common pain point for marketers. When a user revisits a website, their initial entry point data, often carried in the URL’s query string, typically vanishes. This makes it challenging to understand which marketing efforts truly initiated the customer journey. Correctly attributing these conversions is invaluable for several reasons:
- Optimized Budget Allocation: Knowing which channels and campaigns consistently generate high-quality leads allows marketers to shift resources towards the most effective strategies, maximizing their advertising spend.
- Enhanced Campaign Performance: Granular data on lead sources provides insights into what resonates with different audience segments, enabling more targeted messaging and improved creative development.
- Personalized Customer Journeys: Understanding a lead’s origin can inform personalized nurturing sequences and sales pitches, leading to higher engagement and conversion rates within your Customer Relationship Management (CRM) system.
- Clearer ROI Measurement: Direct attribution facilitates a more accurate calculation of return on investment for each marketing initiative, justifying marketing expenditures and demonstrating tangible value to stakeholders.
This guide champions the practice of embedding source information directly into your CRM, such as ActiveCampaign, ensuring that every lead’s journey is meticulously documented from the outset.
Chronology of Implementation: A Step-by-Step Framework
The following steps outline a comprehensive approach to integrating UTM parameter tracking into ActiveCampaign using Google Tag Manager. This method ensures that vital lead source data is captured and retained, providing invaluable insights for your marketing efforts.
Phase 1: Preparing ActiveCampaign for Data Ingestion
The journey begins within ActiveCampaign, where custom fields must be established to house the incoming UTM data.

1. Creating Custom Fields in ActiveCampaign:
To store the granular source information, dedicated fields are required within ActiveCampaign’s contact profiles. These fields will correspond to the standard UTM parameters used in digital marketing.

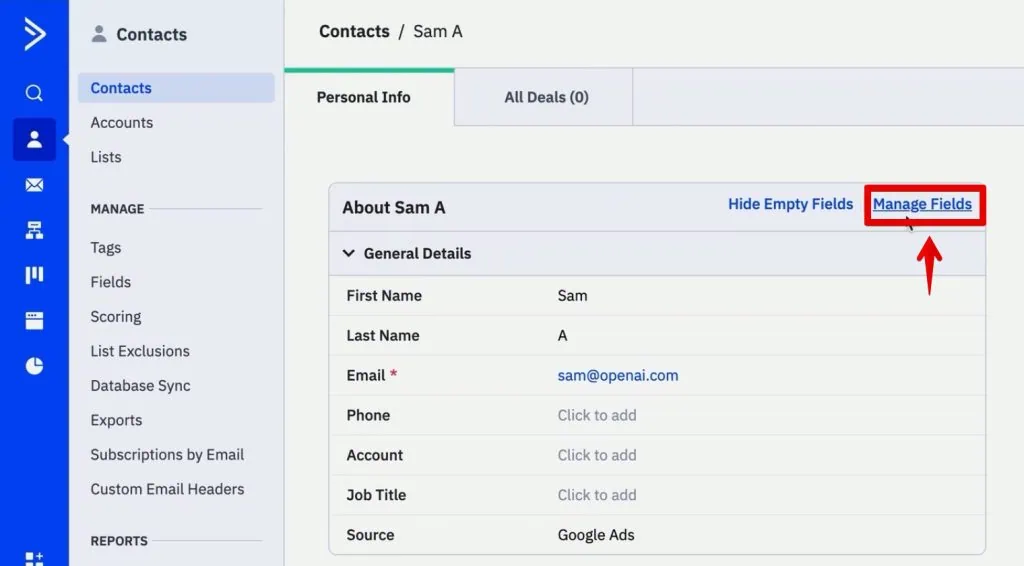
- Navigate to the Contacts section in ActiveCampaign and click on Manage Fields.
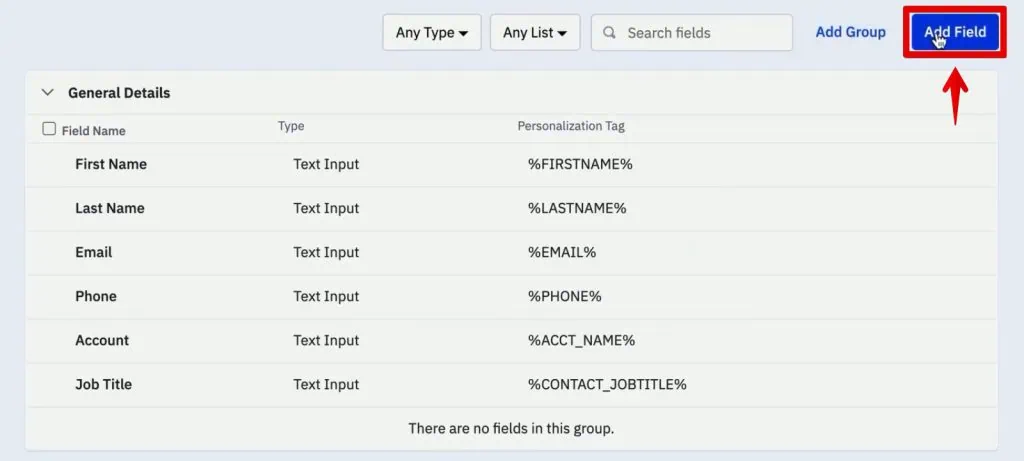
- Click Add Field in the top-right corner.
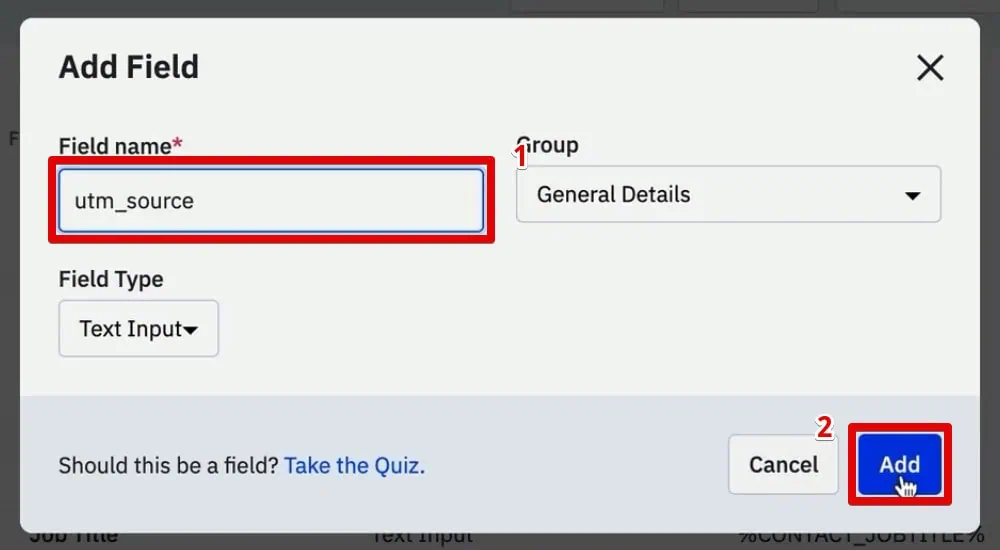
- Create the following custom fields, selecting "Text Input" as the field type for each:
utm_source(e.g., "google", "facebook", "newsletter")utm_medium(e.g., "cpc", "social", "email")utm_campaign(e.g., "summer_sale_2024", "product_launch")utm_content(e.g., "banner_ad_v2", "text_link_sidebar")utm_term(e.g., "buy+shoes", "digital+marketing+course")
- While there are additional UTM parameters available, these five represent the most common and critical data points for lead attribution. Once created, these fields will be visible within each user’s profile on the contacts page, ready to be populated.
2. Building an ActiveCampaign Form with Hidden Fields:
Next, a signup form needs to be configured in ActiveCampaign to include these new custom fields. The crucial element here is to make these fields "hidden" from the end-user, ensuring a clean user experience while still capturing the data.

- Go to Website then Forms and select to create a new form.
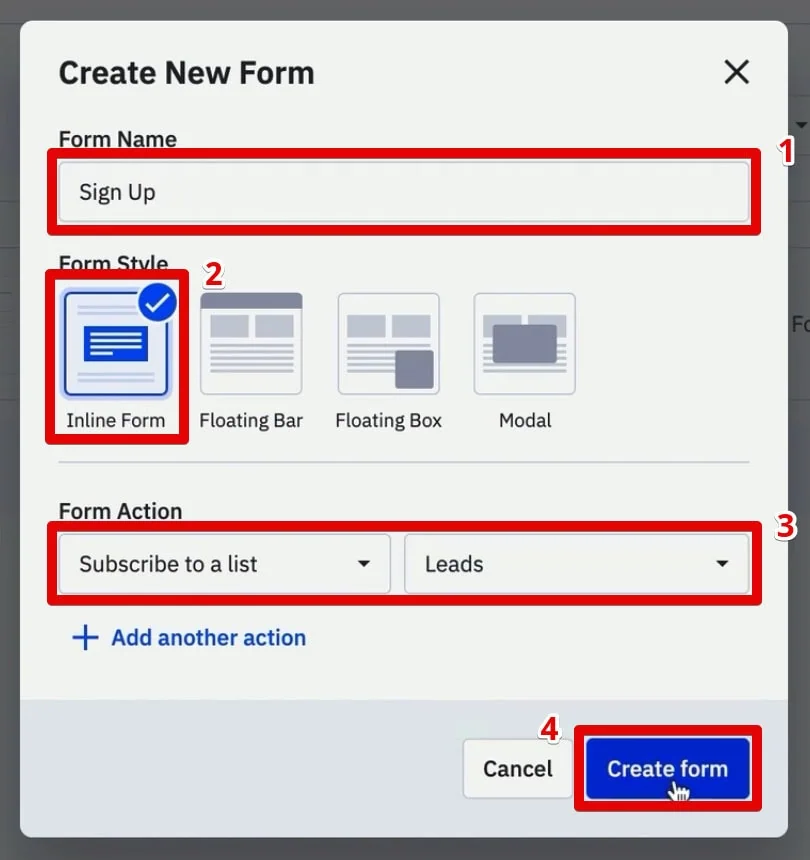
- Name the form descriptively (e.g., "Website Sign Up Form").
- Choose Inline Form as the form style. This is essential as it allows for direct HTML manipulation.
- Set the form action, for example, to Subscribe to a list and select your desired list (e.g., "Leads").
- Click Create form.
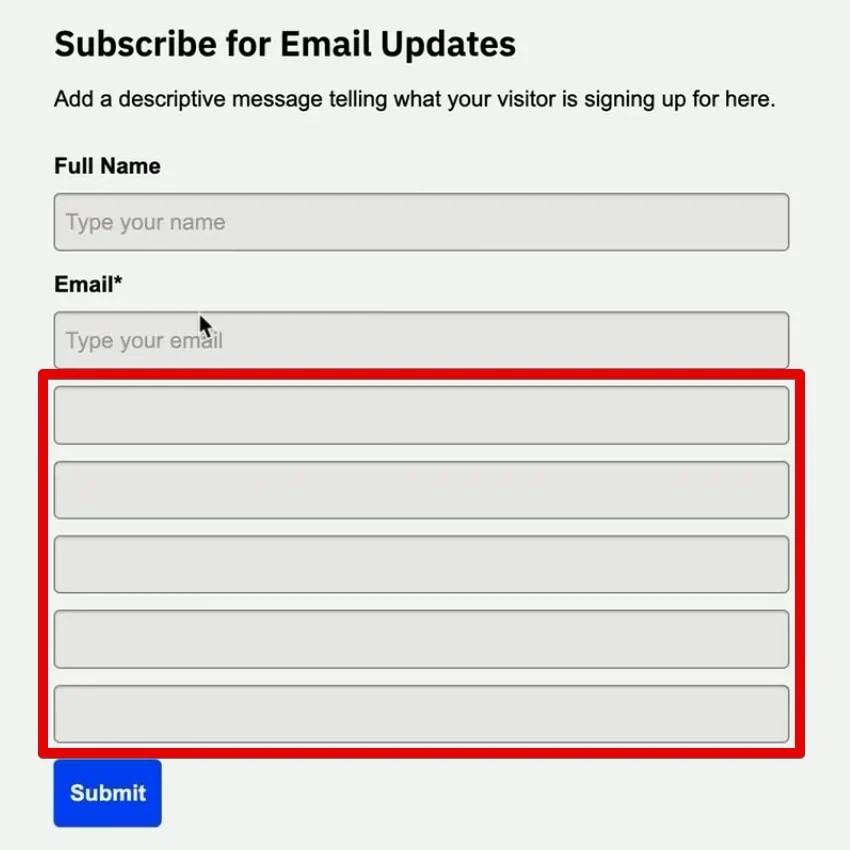
- In the form editor, drag and drop the newly created UTM parameter fields (
utm_source,utm_medium,utm_campaign,utm_content,utm_term) onto the form canvas. - For each UTM field, remove the field header or label. This is a preliminary step to prepare for hiding them.
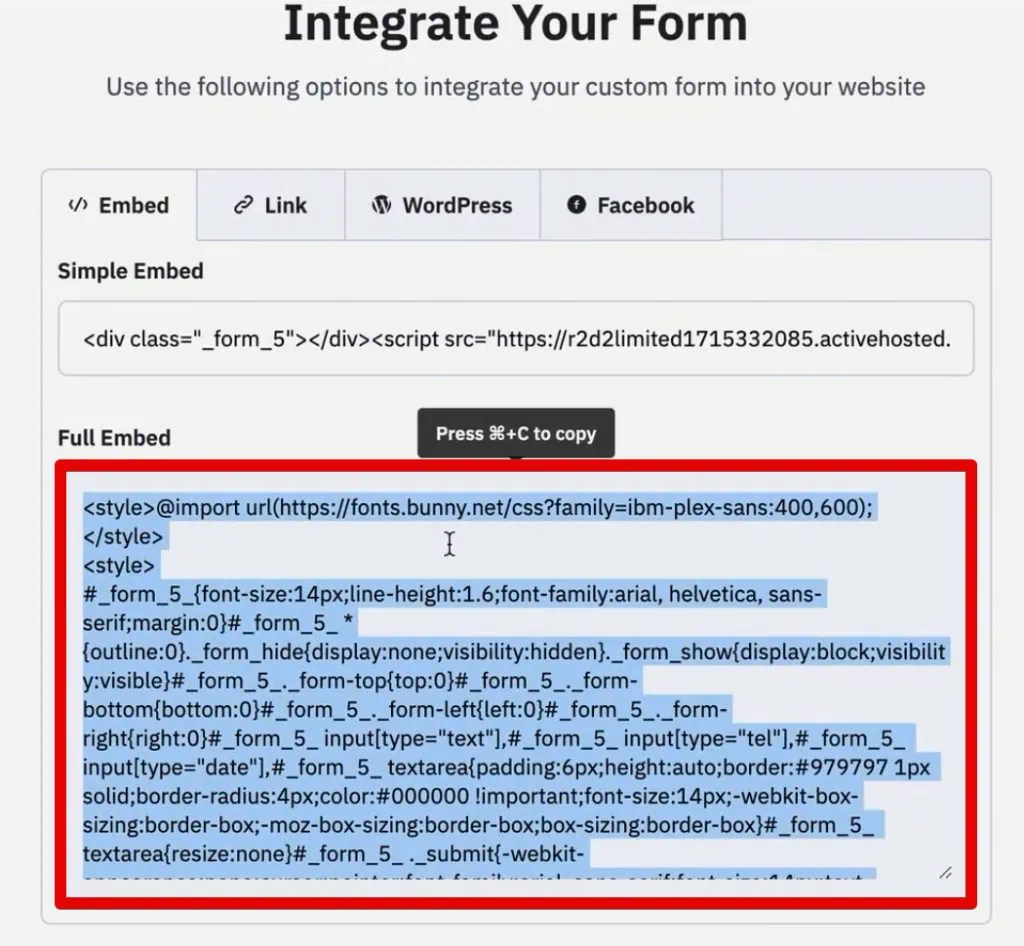
- Click Integrate to access the full embed HTML code for your form.
- Copy this HTML code. This code will be pasted into your website’s source HTML where you wish the form to appear.
- Modifying the HTML to Hide Fields: Once the form HTML is embedded on your website, you’ll need to edit it further. Using your website’s HTML editor or content management system (like WordPress), locate the
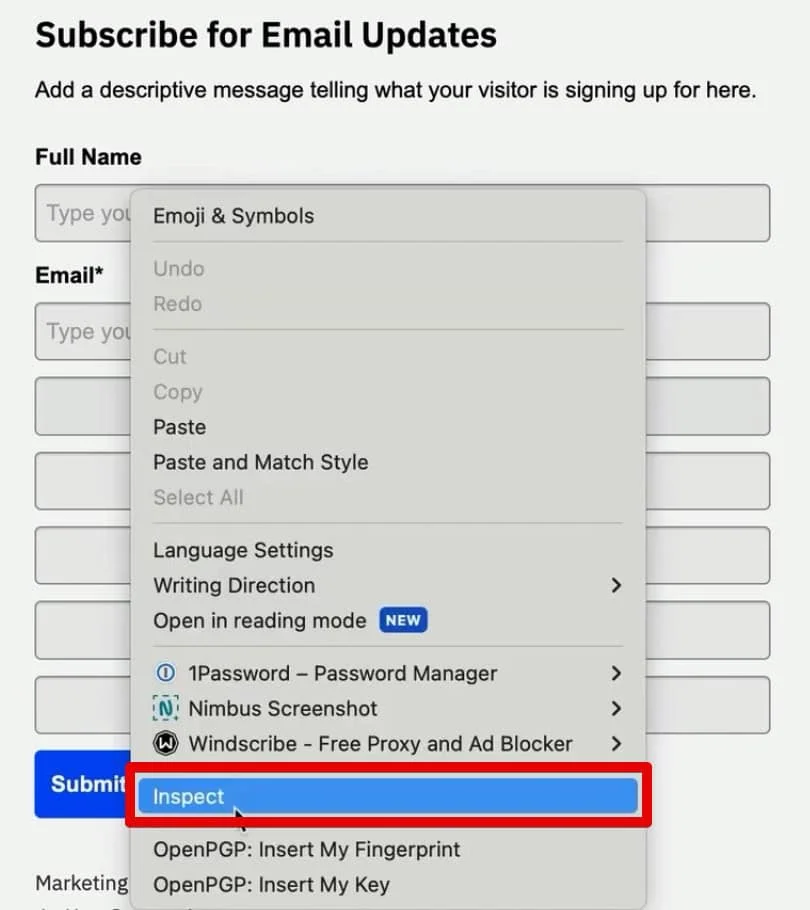
inputtags corresponding to your UTM fields.- Identifying Fields: If the field names aren’t immediately intuitive, use your browser’s Developer Tools (right-click on the visible field on your live site and select "Inspect"). This will reveal the HTML structure, including the
nameordata-nameattributes (e.g.,data-name="utmsource") and theid(e.g.,_field_5). - Hiding: For each UTM input field, change its
typeattribute fromtexttohidden. For example,<input type="text" id="_field_5" name="field[5]" value="" data-name="utmsource">becomes<input type="hidden" id="_field_5" name="field[5]" value="" data-name="utmsource">. - Caution: Exercise extreme care to only change the
typeattribute for the UTM fields, not essential fields like "name" or "email," which users need to interact with.
- Identifying Fields: If the field names aren’t immediately intuitive, use your browser’s Developer Tools (right-click on the visible field on your live site and select "Inspect"). This will reveal the HTML structure, including the
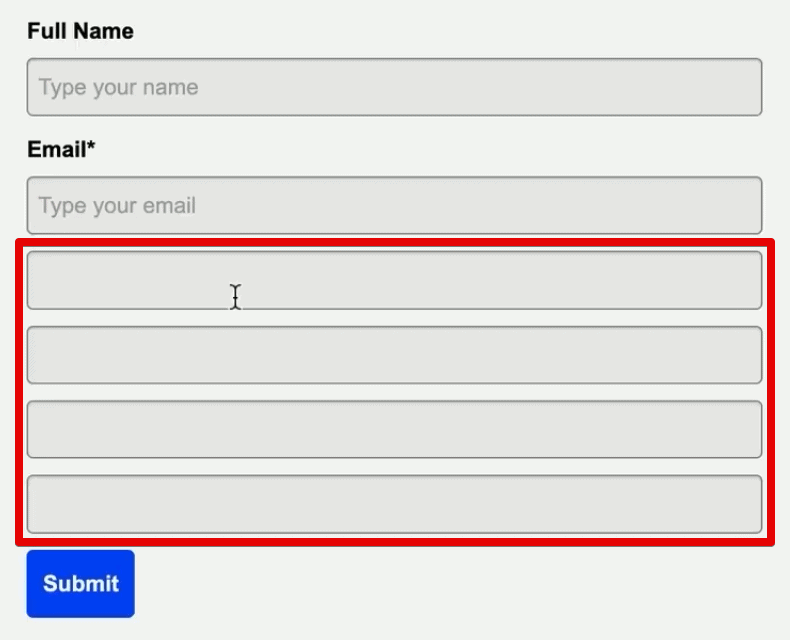
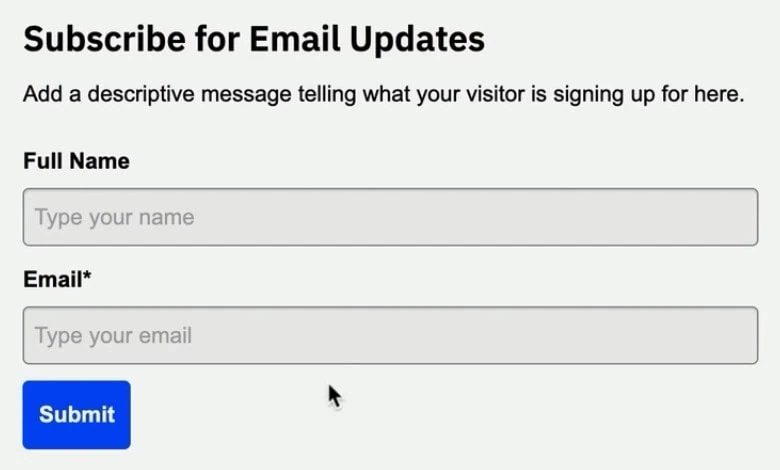
- After updating the page, verify that only the name and email fields (or other intended visible fields) are presented to the user, while the UTM fields remain hidden in the background.
Phase 2: Implementing Persistent Tracking with Google Tag Manager
UTM parameters, when present in a URL (e.g., www.yourwebsite.com?utm_source=google), are typically lost as a user navigates away from the landing page. To ensure this valuable data persists, we leverage first-party cookies and Google Tag Manager.
1. Capturing UTMs into a First-Party Cookie (GTM Tag 1):
This GTM tag will execute a JavaScript code snippet that extracts UTM parameters from the URL and stores them in a durable first-party cookie.

- In your Google Tag Manager workspace, navigate to Tags and click New.
- Select Tag Configuration and choose Custom HTML.
- Paste a JavaScript code snippet (often referred to as a "Source Form Fill" script) designed to read URL parameters and write them to a cookie. This script typically looks for
utm_source,utm_medium, etc., in thewindow.location.searchproperty and stores them in a cookie named, for instance,source_query. The script will also manage the cookie’s expiration and scope. - Name the tag descriptively (e.g., "CHT – Set UTM Cookie").
- Trigger Configuration: The cookie should only be set if UTM parameters are present on the landing page.
- Click on Triggering and create a new trigger.
- Select the Page View trigger type.
- Choose Some Page Views.
- Set the condition to fire when the Page URL contains utm_medium (or
utm_source, as a common indicator that UTMs are present). - Name the trigger (e.g., "Page View – With UTMs").
- Save both the trigger and the tag.
2. Populating Hidden Form Fields from the Cookie (GTM Tag 2):
This second GTM tag will read the stored UTM data from the cookie and automatically inject it into the hidden ActiveCampaign form fields when a page containing the form loads.

- In Google Tag Manager, create another new tag (Tags → New).
- Select Tag Configuration and choose Custom HTML.
- Paste the second part of the "Source Form Fill" script. This JavaScript will perform the following actions:
- Read the
source_querycookie (or whatever you named it). - Parse the UTM parameters from the cookie’s value.
- Locate the hidden form fields on the page using their unique CSS selectors.
- Populate the
valueattribute of each hidden input field with its corresponding UTM parameter.
- Read the
- Name the tag (e.g., "CHT – Populate Hidden AC Form Fields").
- Trigger Configuration: This tag must fire after the form’s HTML structure is fully loaded and available for manipulation.
- Click on Triggering and create a new trigger.
- Select the DOM Ready trigger type. This ensures the Document Object Model (DOM) is fully loaded.
- Choose Some DOM Ready Events.
- Set the condition to fire when the Page Path contains
crm-leads(or the specific URL path where your ActiveCampaign form is embedded). - Name the trigger (e.g., "DOM Ready – Form Page").
- Customizing CSS Selectors: The JavaScript needs to know exactly which hidden input fields correspond to which UTM parameters. This is achieved through CSS selectors.
- Revisit your website page with the embedded ActiveCampaign form.
- Using Developer Tools, inspect each hidden UTM field (you might temporarily change its
typeback totextoremailin the console to make it visible for inspection, but do not save this change to your live site). - Identify a unique and reliable CSS selector for each field. While copying the input ID (e.g.,
#_field_5) can work, a more semantically meaningful selector might beinput[data-name="utmsource"]if your form elements include such attributes. - Update the JavaScript in your GTM tag with these precise CSS selectors, mapping
utm_sourceto its corresponding selector,utm_mediumto its selector, and so on.
- Save the tag.
Phase 3: Testing and Validation
Thorough testing is paramount to ensure the system functions as intended before going live.

1. Utilizing GTM Preview Mode:

- In your GTM workspace, click the Preview button.
- Enter a URL for your website that includes all the UTM parameters you wish to track (e.g.,
https://www.yourwebsite.com/landing-page?utm_source=test_source&utm_medium=test_medium&utm_campaign=test_campaign&utm_content=test_content&utm_term=test_term). - Click Connect.
- Your website will open in a new tab, connected to the GTM Tag Assistant.
- Verify Cookie Setting: Navigate to a different page on your website (where the UTM parameters will disappear from the URL). Open your browser’s Developer Tools (F12 or right-click → Inspect) and go to the Application tab → Cookies. Locate your domain and find the
source_querycookie. Its value should contain the full query string, including your test UTM parameters. This confirms the first GTM tag is working. - Verify Hidden Field Population: Navigate to the page where your ActiveCampaign form is embedded.
- In the Developer Tools, go to the Elements tab.
- Search for your hidden UTM input fields (e.g.,
input[data-name="utmsource"]orinput[type="hidden"]and then inspect their attributes). - Crucially, check the
valueattribute of these hidden input fields. It should now be populated with the UTM values from yoursource_querycookie. This confirms the second GTM tag is working. - As an extra verification, you can temporarily change the
type="hidden"totype="text"in the Developer Tools (without saving) to visually confirm the fields are filled.
- Complete the form with test name and email details.
2. Verifying Data in ActiveCampaign:
- After submitting the test form, log in to your ActiveCampaign account.
- Go to the Contacts section and locate the test contact you just created.
- Open their contact profile. You should now see the custom UTM fields (
utm_source,utm_medium,utm_campaign,utm_content,utm_term) populated with the data from your test URL.
3. Publishing the GTM Implementation:
Once testing confirms everything is working correctly:

- Return to your GTM workspace.
- Click the Submit button.
- Provide a descriptive Version Name (e.g., "ActiveCampaign UTM Tracking V1.0") and a brief Version Description.
- Click Publish.
This action makes your GTM implementation live for all users visiting your website, ensuring that future leads are accurately tracked from their source.
Implications and Future Enhancements
This robust UTM tracking setup directly within ActiveCampaign offers profound benefits for any marketing team. Beyond simply knowing "where leads come from," it empowers data-driven decisions that can significantly impact your bottom line.

Enhanced Marketing Intelligence:
By having this data readily available in your CRM, you can:
- Segment Audiences: Create dynamic segments based on source, medium, or campaign to tailor email sequences, automations, and sales outreach.
- Personalize Communications: Leverage source data to craft more relevant and engaging messages, improving conversion rates at every stage of the funnel.
- Optimize Ad Spend: Identify the highest-performing campaigns and channels, allowing you to reallocate budgets for maximum impact and minimize wasted ad spend.
- Improve Sales Enablement: Equip your sales team with crucial context about a lead’s origin, enabling more informed conversations and a higher likelihood of closing deals.
Beyond UTMs: Expanding Attribution Horizons:
While UTM parameters are fundamental, the technique described can be extended to capture other valuable attribution data:

- Referrer Information: Track the previous website a user visited before landing on yours.
- Google Click ID (GCLID) and Facebook Click ID (FBCLID): These proprietary IDs from Google Ads and Facebook Ads respectively offer even more precise tracking, especially for connecting offline conversions back to specific ad clicks. Integrating these into ActiveCampaign custom fields via a similar GTM and cookie mechanism allows for comprehensive offline conversion tracking.
Simplifying the Process: The SourceLink App:
Recognizing the technical complexities involved in manual GTM and cookie setups, specialized tools are emerging to streamline this process. For instance, the SourceLink App aims to automate all the steps outlined in this guide. By eliminating the need to "fiddle with form fields and figure out CSS selectors," such tools promise a plug-and-play solution for importing all UTM and attribution data directly into your CRM. Marketers can join waiting lists for such innovative tools to stay ahead of the curve.
Data Privacy and Compliance:
As with any data collection, it’s imperative to consider data privacy regulations like GDPR and CCPA. Using first-party cookies for attribution generally offers greater control and transparency compared to third-party cookies, but users should still be informed about data collection practices through clear privacy policies. Ensure your cookie consent mechanisms are in place and compliant with relevant laws.

Conclusion
Implementing robust lead source tracking in ActiveCampaign through the strategic use of UTM parameters, first-party cookies, and Google Tag Manager is no longer a luxury but a necessity for modern marketers. This detailed, chronological approach empowers businesses to move beyond anecdotal evidence, making informed decisions that drive growth and optimize marketing performance. By understanding the true origin of every lead, you unlock the potential for truly personalized experiences, optimized campaigns, and verifiable marketing ROI.
Whether you choose to master the intricacies of JavaScript and GTM yourself or embrace automated solutions, the principle remains: knowledge of your lead sources is power. This technique, combining the magic of client-side scripting, flexible CRM fields, and powerful tag management, provides a significant leap forward in understanding and influencing your customer’s journey.
